Showing posts with label childhood. Show all posts

Mar 17, 2014

Colorful Sunday

My lovely ladies!

A goood Monday morning to you all...I know most of us hate the Mondays and the Blues..But i for one, love it.. Because after the weekend with family and all the activities and the chores..i finally get my cuppa and some me time alone..!! It feels so relaxing and blissful when the little ones are at school and the big one is at office..BAD bad me...but there it is.. I love my Mondays :)

We had a colorful weekend here at my home....
Visited the flower show in Victoria Park...


It was really very colorful event, but very crowded at with small kids it was not a very friendly place.

On the crafty and crochet front, i am up to no good. The pointlessness of this item says it all..


Yeah, you guessed it!!

A BUNTING, what else!!!

Keep watch this space for the Ta-daah...i have been very excited to crochet this item, made from scraps of wool..totally useless but tottally worth the color satisfaction..

How was your weekend, do write in as i love hearing from you..

Till next time..
xxx

Sep 19, 2013

DIY Yarn Lights

Ok my friends!


I have officially lost it. Can you find it anywhere? Any store where it is  available at a discount or a buy 1 get 1 free offer?? Any advice on how to regain it back? Have you lovely people been in this position before? In case you are still with me.. and want to find out what I have lost.. here goes nothing..


and also I do not understand what my kids want anymore..
I always knew raising 2 small kids would be a challenge, but now a days my little man is in his terrible two's and my little princess hasn't yet grown up from her terrible two's! Its been so frustrating for me as a mother. I really don't know sometimes if I am doing the right thing. Is it more important that they follow rules or eat their food? I am trying to get my girl to eat on her own and that is requiring a lot of effort. My son just refuses to sit in one place even for 5 minutes!! Why are their batteries always fully charged?? Uff!!


 Anyways, I remember to take a deep breath and imagine that they will grow up and I will laugh about this post :) SO coming back to my crafty pursuits, I had done this with all the spare yarn. More specifically cotton threads with me.


I followed this link HERE and a bit of my own research and experiments to make this lantern lights. Added a string of lights inside to complete the picture.


This was done for my son's school - DIY Lantern from Recycled materials. It is a very VERY messy affair to do it. But the results are just amazing. Go ahead and have some fun, try to include your kiddo in this process, I am sure they will have a blast!
 

So I am off to set my house straight...It really looks like a hurricane crashed into it ..he he!

Hope you have a pleasant weekend ahead. We have a long weekend here for the Mid-Autumn Festival. Did I say long weekend, yes 3 days of 3 (2+ 1 hubby) kids all the time in the house...ahhhh.. wish me LUCK!!!

Love,
xxx

May 14, 2013

Tutorial :: Crochet Case/Pouch

Hello my lovelies!

How are you doing today? Can you believe that we are already in the 5th month of this year....where is the time going...Seems like it was just the beginning of the year and already we are in the middle of the 5th...I remember reading all the lovely posts in blogger land about the year end reviews..and it just seems like yesterday :)

The beginning of this year i wanted to use this blogging site to develop my creativity and also provide a few tutorials on the way of my journey...this is a small step in that direction..My first attempt so please excuse any blunders on the way...

Here's what i am trying to make today..This pattern is very flexible, can be done with any thread/yarn and any stitch. Its more of a guideline and your creativity is the limit to what you can do with it!

Warning :: Picture overload to substitute for words :)


Get these things ready
*Crochet swatch in any stitch and measuring any size you like for your pouch/case. Make sure that the swatch is double the length of your desired purse. For Ex: If you want a purse measuring 6" by 4" then crochet a swatch of 12" by 4" and fold in the middle to get a 6" by 4".
*Adequate length zipper.
*Crochet doily of your choice/crochet flowers/mandala/anything you want to add the extra zing to your case :)
*Sewing needle and matching thread.
*Lining fabric.

I used a basic Moss stitch for my purse. There are loads of tuts on the net for the same. I am writing a pattern i used, which i found most comfortable.

Even number of stitches.
I chained 130 stitches using Laura Knitting Cotton and 3.5mm hook.

Row1: 1 SC in 2nd ch from hook, *1CH, skip 1 ch, 1 SC in next ch, repeat from * to end, turn.
Row2: 1 CH, skip first sc, *1 SC in 1 ch sp, 1 CH, skip 1 sc, repeat from *, ending 1 SC in 1 ch, turn.
Repeat row 2 till the swatch measures up to the height you need.


Using a matching thread and embroidery needle, whip stitch the swatch by folding in half and stitching along the bottom only.


Here you can see that i have stitched the bottom part. DO NOT STITCH the 1 open side. This is important as it helps in easy sewing of the zipper.


Now, unzip the zipper and line it to the purse. Make sure you are having the wrong sides (WS) of both the crochet swatch and zipper together. Pin it in place and stitch it using back stitch taking care that big stitches do not come in the right side..


Make small stitches as possible to keep zipper fixed firmly and also to hide the stitches in front view of the purse.

 Do the same with the other end of the zipper too. Take care NOT TO pull the zip thru the entire length of the purse.!!

Now you have attached the zipper to both ends of the purse and you only need to stitch together the 1 side you had left. Remember??


 Now stitch the remaining one side...


Turn your purse inside out and voila!!!
You are done !!!! Well almost :)))


I have the need to line all my purses and bags and blankets...so i used this fabric for lining. Lotsa tuts on the net for this and you should be able to sew/stitch this easily...When you attach the lining make sure it is done over the zipper so that it covers the zipper stitches.


and now for the fun bit. I made a doily and sewed it in place.
You can make anything from flowers, to motifs, use buttons, beads...the options are endless!!


You can make any kinda purse, a few ideas to get you started...

 Rainbow Case

 Granny square in 2 rounds Case

 Blues Case

Phew!!!
Hats off to those who write for us, providing step by step instructions and photos for every single stitch. I have renewed respect for my fellow bloggers today :)


Hope you had fun with this, as much as i did.

Do write in and let me know if you have any questions or need any clarifications :) Love to help you out and hear from you as always..

Love,
xxx

Mar 20, 2013

Comfort Crochet

Hello my dear lovely readers!

How are you guys doing...A warm welcome to all my new friends. I truly cherish this friendship and value all your lovely comments! It really brightens up my day and makes my crafty adventures more awesome :)

A special thanks to all you guys for the kind words on my previous post of Garden of Flowers jacket.
The jacket was also featured in Sara's blog - My Merry Messy Life - Hookin on Hump Day #37.

Wearable and thread crochet are great to do, but not like some soul crochet. You know what i mean - comfort crochet. In Hong Kong the comfort food is the sweet bun, i see people eating it for breakfast and in between meals.As a south Indian for me the comfort food is idle and sambar. I can eat it any item any where and do it almost every week @ home.

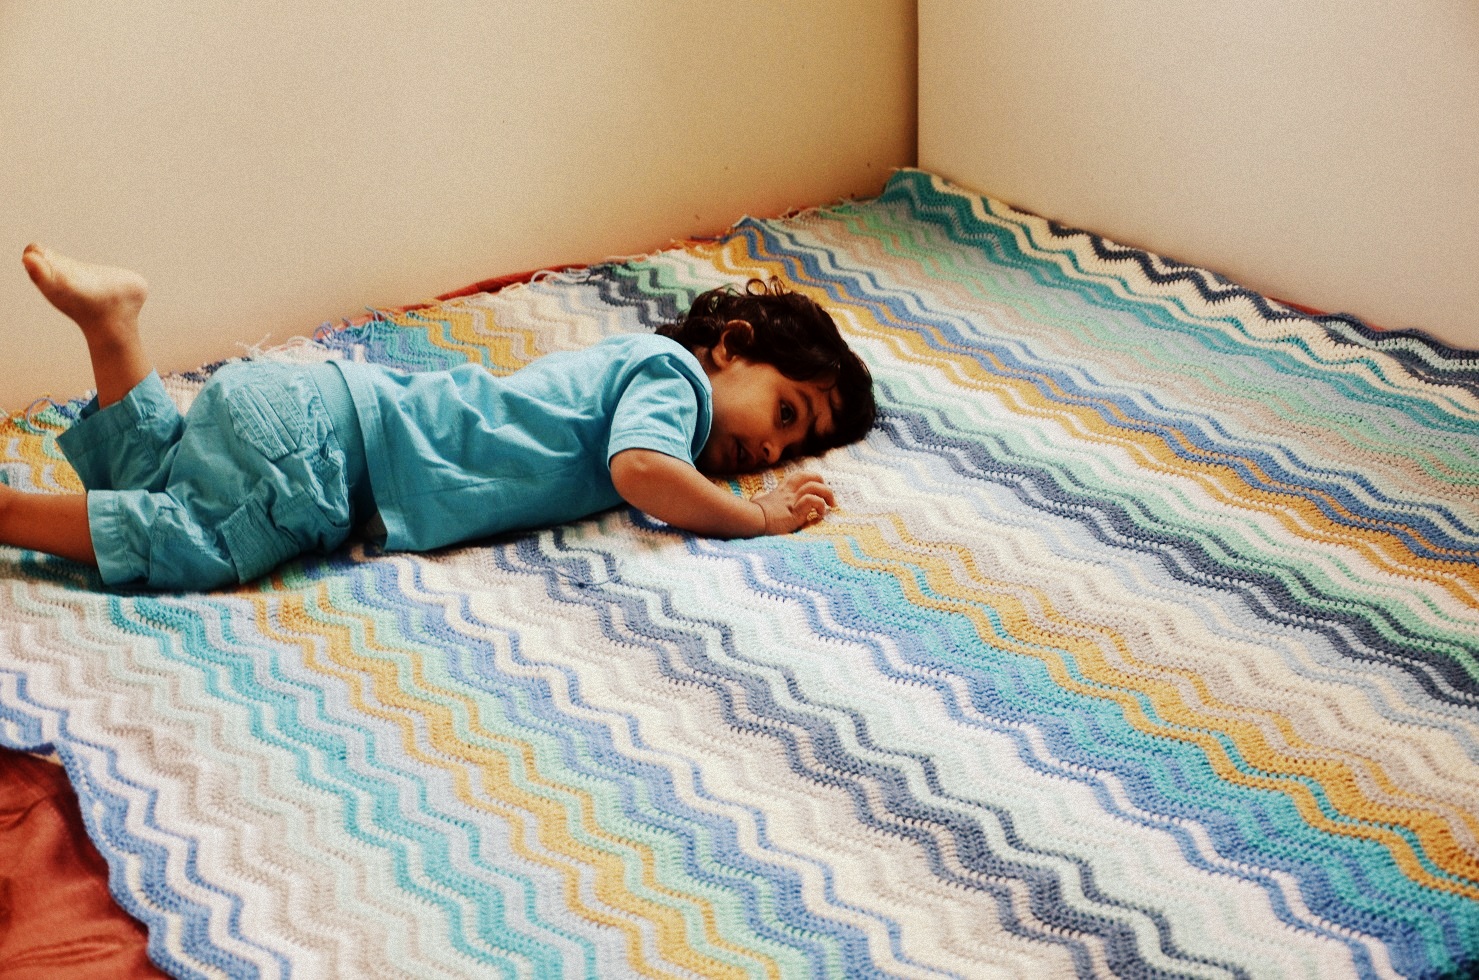
In terms of crochet my current project is really comfort one. You can do it when you are watching TV, babysitting the kids, playing with the toys, or in between household chores...Its the ripple blanket. I picked it up after completing my jacket.


 My man in blue - loved jumping on the ripples...


 I am planning to make it for a queen size bed. Basically it is for a single bed, but loads of room for the turning in sleep type people :) Currently covers 2/3 of my bed and need to do 1/3 more and then the border and i am planning to add a flannel lining to it. Let me see how it does about...


 Some Easter egg decorations me n the little miss made for her school Easter Egg competition.
 Since we don't eat eggs at home i made these from thermocol eggs found in my local craft store.

Coming back to my comfort project, i line up my next 10 colors and take a snap shot of it. Then its easy peasy...1 row  then a color change, 2nd colors of 2 rows, another color change 1 row...and you have the interlock ripples..You can find the pattern i have used from Lucy's Attic24 HERE.

So off i am now, to enjoy some cold drink and back to my hook and some favorite site-com.

Stay crafty and stay happy. Love to hear from you as always...

Love,
xxx


Mar 12, 2013

Garden of Flowers Jacket

Hello my lovely people!

Are you enjoying the weather outside. I must say that its been wonderful here, about 20 degrees with loads of sunshine in the day time. A great time of the year before the horrid humid summer n rainy season set in.

Hope your hooks have been busy and your crafty juices flowing and livening up your lives and homes and studios and whatever space you own :)

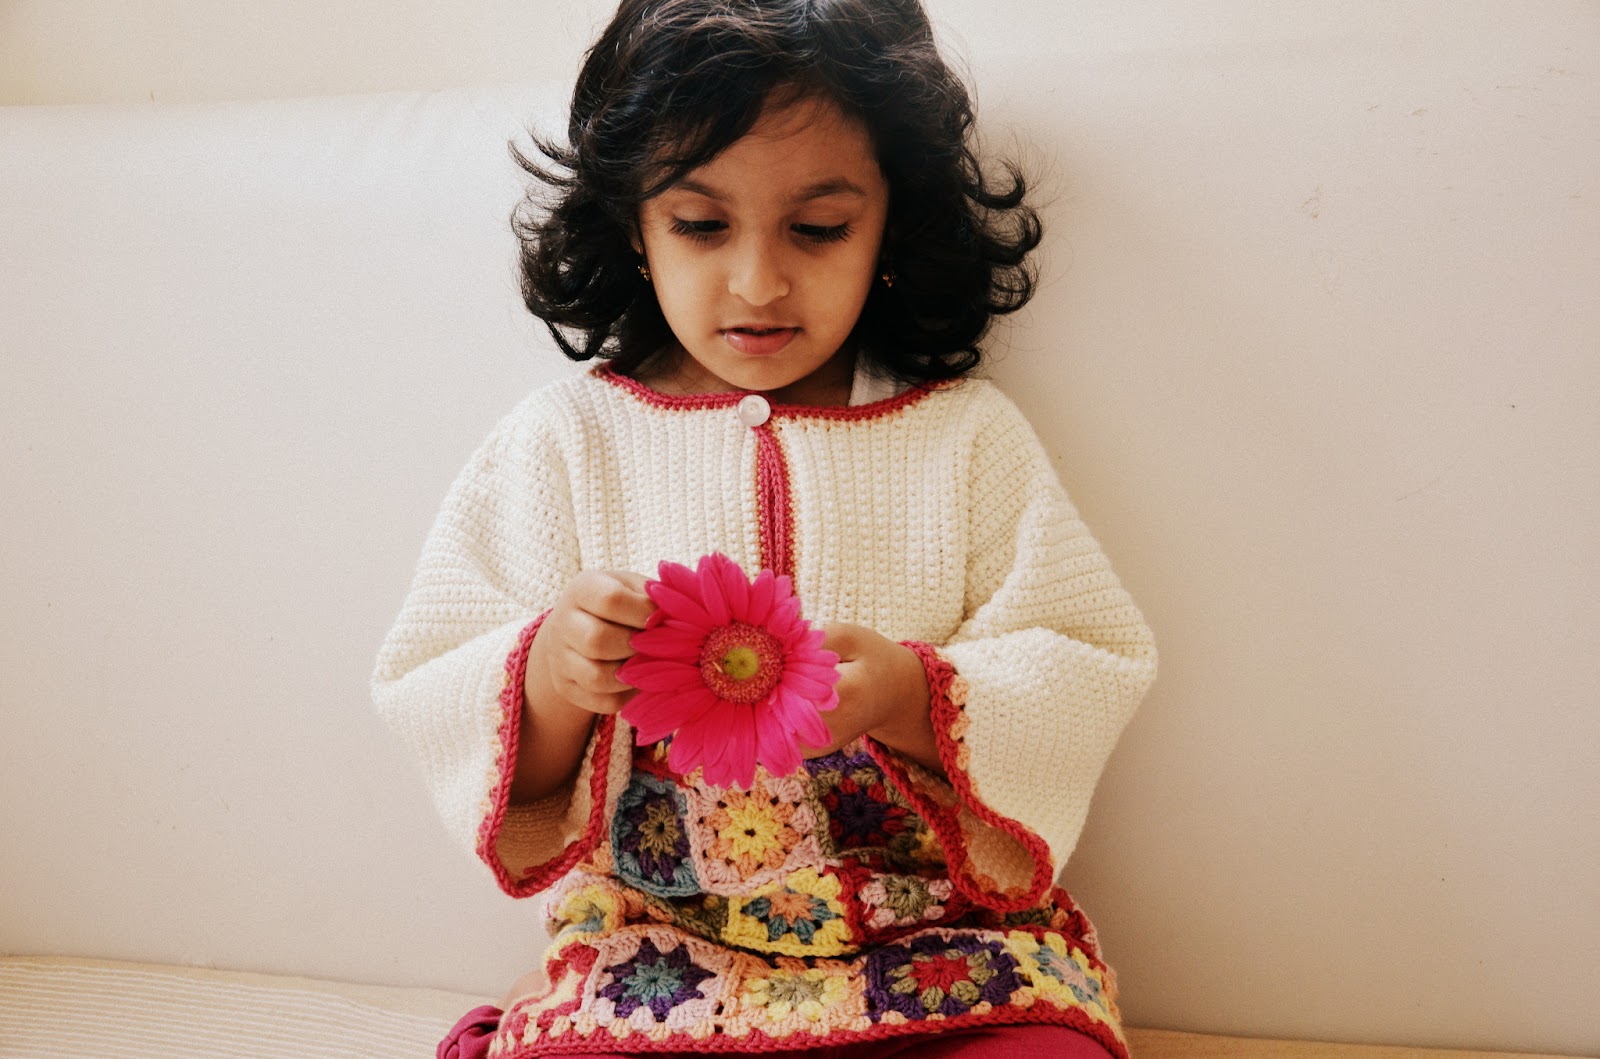
I was always smitten by the traditional granny square but when ever i wanted to hook a wearable, it was never a granny as i did not find any good patterns online or in print. Finally i came across an inspiration from the book Granny Crochet Favourites and this is the result..


 ...oooops...he sneaked in somehow.. :)
and is puzzled by what his mom's doing!


Some awesome flower therapy - the Gerbera daisies. They add a dash of color to any dull space and they are my latest favorite flowers, bought from the local fresh market...


Wearable crochet is always tricky i feel, especially when you are doing your own pattern and do not know how it will turn out...

I will try to give some info on how this jacket can be hooked. But this is just for idea and NOT an exact pattern. I am too lazy to click step-by-step pics :P

So here goes nothing...

1.Try to read the below diagrams..


 This was the draft for my project. If you click on the image, you will get a more readable size i hope! Basically the first step is to determine the chest size and the length. Crochet a patch of any type of granny squares to meet the requirements. You need to horn your maths my dear friends for this...Not a pleasant zone i hear you say!! Couldn't agree more with you...

Crochet 2 such patches. You can see the color blocks in the pic above.

2. Determine the sleeve to sleeve length and the width of the sleeves. Begin with a starting chain = width of sleeve and do SC's while turning the work after every row.

3. After you reach the length required, you are going to do the back yoke. This was half the width for me. Continue doing SC's till you reach the length = width of chest. NOTE : This yoke length should be equal to the width of your granny patch.

4.Continue with next sleeve by chaining the additional half chains and then working SC's again till you reach the end of the sleeve. Fasten off.

5. Refer to fig again to know where to begin the front yoke and the neck decreases. Any question, feel free to pop in! 

6.Attach the 2 granny patches and your jacket would look something like this now..

7.I used SC to attach the two sleeves and the front and back patches too. 

8. Crocheted a simple border of 2 rows of granny stripe around sleeves and jacket ends.


9. Also a border of 2 rows of SC around the neck and fastened off with a button to keep it in place.

And here comes the Ta-daaah!!!
 ..
.
.
.
.


 My girl was extra extra happy and gave me loads of kisses and said she will not share this jacket with anyone! Silly things to make my day :)

Some more details:

Yarn used : Sublime baby cashmere merino silk DK in various shades of spring + 4 balls in cream for the sleeves and yoke.
Hook size : 3.5mm
Granny Flower Pattern LINK here. Tweaked this pattern a bit so that it looks more solid and less spotty.

Little Miss:  Totally cute and flower girly types.
Me:  Blissful, satisfied, totally happy as something which i formed in my head and later on paper yielded the exact results i was expecting!!! Yipeeeeeee
 Flower : Sad and broken @ Little Miss's hands.

Hope you guys found some sense in what i have tried to explain. 
Love to hear from you guys as always.. Hope you are safe, happy and crafty...

Lotsa love,
xxx.