
Hello my lovely people!
Friday is such a good day. Just because its Friday. Am sure you guys have lotsa lovely plans for your weekend and are looking forward to spending it with your loved ones and going what you love the most. Be it cooking up a favorite meal or hooking up a new project or a redoing a tiny bit of your home.
In the past couple of months i have taken to crochet as a healing mechanism or rather a creative therapy against raising 2 small children, Its been very comforting and relaxing putting the kids off to sleep and making myself a hot cuppa coffee and hooking new projects. In those late night hours or early morning hours i do get my ME time!! The rest of the day just disappears in one whirl of chores, baths, feedings, cleaning, schooling, playing and what not.
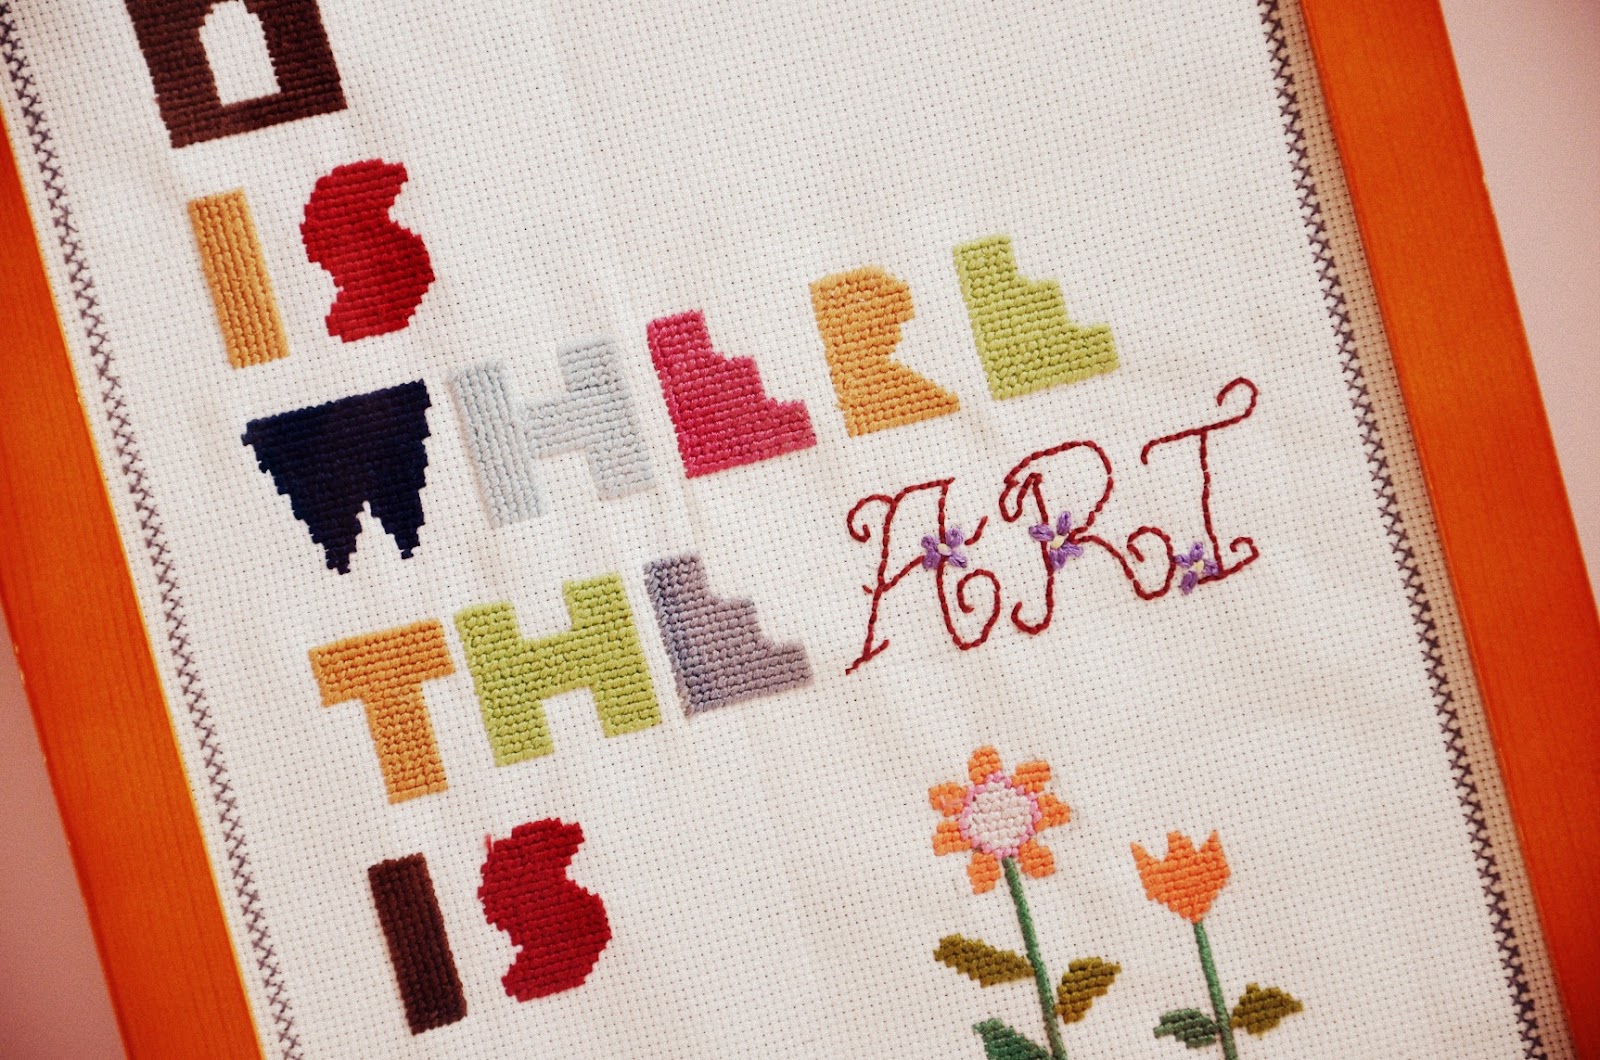
The kids and me watch a particular show on Cbeebies - Mister Maker. Its a huge hit with them and with me too. He has lotsa crafty things to show and do. He always ends his show with the tag - Now your home is where the art is. I decided to get this down as a wall decor item in the house, as of-course our home is a creative and arty one! Did this with cross stitch and it took me quite a while as i can only touch the needle sans the kids.
Ready for a look???

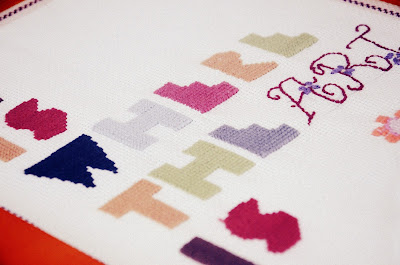
Border is a simple alternate rows of cross stitch. Did it with just 2 strands of thread.


Free hand calligraphy for the word "ART".


Framed and now in its place of pride, as soon as one enters the home.

For those of you who want to get your hands into cross-stitching and making such home decor items - a few pointers.
1.Pick any design. It could even be a photograph of something you love. A flower, a strawberry or even any comic character.
2.Go through the link and directions in this eHOW page.
3.Once you have your pattern pixel-ed out, get a print out. Its really difficult counting the crosses on the computer. Also maybe one can plan ahead and pre-count the stitches before beginning their work.
4.I used the 11 count Aida for this pattern. Find more information HERE.
5.For 11 counts, 2 strands is better as it shows the crosses better. But since i was mostly doing alphabets, i wanted a bolder matte finish. So i went ahead and used a 6 stranded thread. You can see the difference between the letters(which look bolder) and the border(which looks normal) here.

6.Lots of crosses afterwards you are rewarded with the picture in your mind transforming itself in fabric :)

There is something so wonderful about dreaming and visually fantasizing a thought and then working towards achieving it. Then the end result is of-course beautiful and there for everyone to watch, but the journey which you enjoy is experienced by the dreamer alone. And i thoroughly enjoyed this cross-stitch journey!!
You can read more about the spring time clock HERE.
So my lovely people,
I am off to being my weekend now. Feeling jumpily happily happy with myself currently :)
Hope you have a great weekend, enjoy yourselves and do be good!!
Love,
xxx
Friday is such a good day. Just because its Friday. Am sure you guys have lotsa lovely plans for your weekend and are looking forward to spending it with your loved ones and going what you love the most. Be it cooking up a favorite meal or hooking up a new project or a redoing a tiny bit of your home.
In the past couple of months i have taken to crochet as a healing mechanism or rather a creative therapy against raising 2 small children, Its been very comforting and relaxing putting the kids off to sleep and making myself a hot cuppa coffee and hooking new projects. In those late night hours or early morning hours i do get my ME time!! The rest of the day just disappears in one whirl of chores, baths, feedings, cleaning, schooling, playing and what not.
The kids and me watch a particular show on Cbeebies - Mister Maker. Its a huge hit with them and with me too. He has lotsa crafty things to show and do. He always ends his show with the tag - Now your home is where the art is. I decided to get this down as a wall decor item in the house, as of-course our home is a creative and arty one! Did this with cross stitch and it took me quite a while as i can only touch the needle sans the kids.
Ready for a look???

I had sooo much fun doing this project. Got a few colors wrong and had to undo the cross stitching. But in the end, love the colors.

Border is a simple alternate rows of cross stitch. Did it with just 2 strands of thread.


Free hand calligraphy for the word "ART".


Framed and now in its place of pride, as soon as one enters the home.

For those of you who want to get your hands into cross-stitching and making such home decor items - a few pointers.
1.Pick any design. It could even be a photograph of something you love. A flower, a strawberry or even any comic character.
2.Go through the link and directions in this eHOW page.
3.Once you have your pattern pixel-ed out, get a print out. Its really difficult counting the crosses on the computer. Also maybe one can plan ahead and pre-count the stitches before beginning their work.
4.I used the 11 count Aida for this pattern. Find more information HERE.
5.For 11 counts, 2 strands is better as it shows the crosses better. But since i was mostly doing alphabets, i wanted a bolder matte finish. So i went ahead and used a 6 stranded thread. You can see the difference between the letters(which look bolder) and the border(which looks normal) here.

6.Lots of crosses afterwards you are rewarded with the picture in your mind transforming itself in fabric :)

There is something so wonderful about dreaming and visually fantasizing a thought and then working towards achieving it. Then the end result is of-course beautiful and there for everyone to watch, but the journey which you enjoy is experienced by the dreamer alone. And i thoroughly enjoyed this cross-stitch journey!!
You can read more about the spring time clock HERE.
So my lovely people,
I am off to being my weekend now. Feeling jumpily happily happy with myself currently :)
Hope you have a great weekend, enjoy yourselves and do be good!!
Love,
xxx
that's a happy new header, really nice. The cross stitch is great, the lettering is good and I like the little flowers. And what a cheerful clock! I'm sure your kids like that on the wall!Heather x
ReplyDeleteThanks for stopping by, yes they do love anything which can be destroyed :)
DeleteSuperb! Congrats. ;)))))
ReplyDeleteI really like this idea! I might have to come up with my own version.
ReplyDeleteI'm so glad that I'm following you! Your cross stitch is beautiful, great job! Thanks for posting on Terrific Tuesdays link party.
ReplyDeleteKatie
www.funhomethings.com
I love your picture! Great colors, and it looks so nice next to your flowered clock! I've got to make that! Thanks for sharing at Hookin On Hump Day!
ReplyDelete